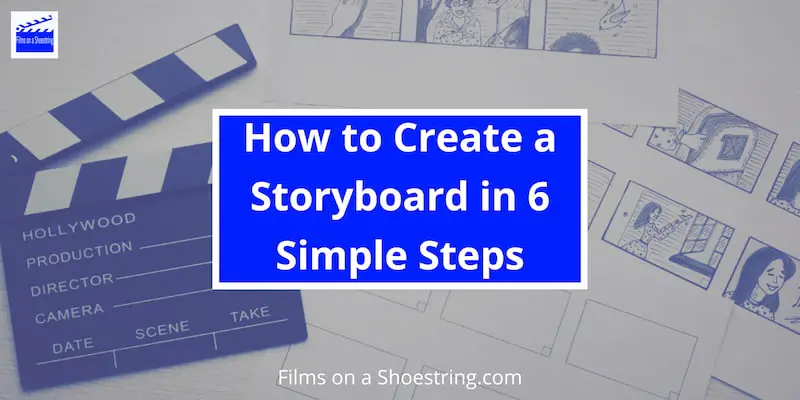
Learn how to create a storyboard in six simple steps, and learn some of the benefits and challenges of the process.
Storyboarding is an essential tool in the filmmaking and video production process. It helps you plan and visualize your shots, ensuring that you capture the right footage and tell your story effectively.
Whether you’re a seasoned filmmaker or a beginner, learning how to create a storyboard can greatly enhance the quality and efficiency of your video and filmmaking projects.
In this blog post, we will outline six simple steps to help you create a storyboard that brings your vision to life. So grab a pen and paper, and let’s get started on your storyboard journey.
Creating a Storyboard in 6 Steps
- Determine the purpose and goals of your storyboard and choose the medium and format.
- Outline the major scenes and sequences of your project and determine the key visual elements and actions in each scene.
- Start by sketching rough frames for each scene, using simple shapes and stick figures to represent characters and objects.
- Refine your sketches by adding more details and annotations, such as camera angles, shot types, and dialogue.
- Arrange your frames in a logical sequence to tell a cohesive story, considering the flow and pacing of your project.
- Review and revise your storyboard for clarity and effectiveness before sharing it with key stakeholders and collaborators.
What is a storyboard?
A storyboard is a visual representation of a film sequence or a project that breaks down the action into individual panels.
It is essentially a series of drawings or reference images that illustrate each shot in a scene.
Storyboards provide visual guidance for the look, feel, and movement of the project, and they indicate the staging of actors and camera placement. They can also include dialogue and sound direction.
Storyboards serve as a trial-run for the final product, allowing filmmakers to refine their ideas and share them with their team and stakeholders.
Why is storyboarding important?
Storyboarding is an essential step in the filmmaking process for several reasons:
Visualization: Storyboarding allows filmmakers to visually plan out their film, translating their ideas from their heads onto paper. It helps them refine their concepts and see how the scenes will unfold.
Communication: Storyboards act as a communication tool, allowing filmmakers to share their vision with their team, including cinematographers and production crew. It ensures that everyone is on the same page and working towards a unified vision.
Efficiency: By storyboarding, filmmakers can identify any potential issues or challenges ahead of time and find solutions before going into production. This helps streamline the filmmaking process and saves time and resources.
Creative Decision-making: Storyboarding allows filmmakers to experiment with different shot compositions, camera angles, and visual elements. It gives them the freedom to explore creative choices and make informed decisions about how to best tell their story visually.
Cost-saving: Storyboarding helps filmmakers identify any unnecessary shots or sequences that can be eliminated to cut down on production costs. It enables them to plan their shoots efficiently and avoid costly reshoots or revisions.
Storyboarding is crucial for both live-action and animated films, as it helps filmmakers visualize and plan out their ideas before entering the production phase. It is an invaluable tool for ensuring a smooth and successful filmmaking process.
Step 1: Determine your project
Identify the purpose and goals of your storyboard
Before you start creating your storyboard, it’s important to identify the purpose and goals of your project.
This will help guide your storytelling and ensure that your storyboard effectively communicates your vision. Here are a few steps to help you identify the purpose and goals of your storyboard:
- Define the purpose: Determine what you want to achieve with your storyboard. Are you creating it for a film, animation, advertisement, or another type of project? Clarifying the purpose will help you tailor your storyboard to meet specific objectives.
- Outline the key messages: Identify the main ideas or messages you want to convey through your storyboard. This will help you structure your scenes and ensure that each frame contributes to the overall story.
- Determine the target audience: Consider who your audience is and what they need to understand from your storyboard. Tailor your visuals and language to resonate with your target audience.
- Set specific goals: Determine the specific goals you want to achieve with your storyboard. This could include capturing the attention of your audience, evoking specific emotions, or showcasing the key features of a product.
- Consider the desired outcome: Think about the actions or responses you want your audience to take after viewing your storyboard. Whether it’s inspiring them to take action, educating them on a topic, or simply entertaining them, understanding the desired outcome will help you craft a more impactful storyboard.
Remember, the purpose and goals of your storyboard will vary depending on the nature of your project. Take the time to clearly define these aspects before diving into the creation process.
This will ensure that your storyboard effectively communicates your vision and achieves its intended purpose.
Choose the medium and format for your storyboard
When creating a storyboard, it’s important to choose the medium and format that works best for you. Here are some options to consider:
Traditional Hand-drawn Storyboards: Many filmmakers still prefer the classic method of drawing storyboards on paper. This allows for more creativity and customization, but it can be time-consuming and may require artistic skills.
Digital Storyboards: With advancements in technology, many filmmakers now opt for digital storyboard tools. These tools offer a range of features and templates that make the process quicker and easier. Some popular digital storyboard software includes StudioBinder, Toon Boom Storyboard Pro, and Shot Designer.
Templates and Apps: There are also various storyboard templates and apps available that can assist in creating professional-looking storyboards. These can be downloaded online or accessed through different software options.
If you’re just starting out, you can quickly and cheaply create a storyboard using sticky notes or post-it notes.
Here’s a table summarizing the benefits and considerations of the different options:
| Traditional Hand-drawn Storyboards | Digital Storyboards | Templates and Apps | |
| Benefits | Allows for creativity and customization | Quick and efficient process | Convenient and accessible |
| Provides a tangible, physical reference | Offers a range of features and templates | Simplifies the storyboard creation process | |
| Considerations | Can be time-consuming | Requires access to digital software and tools | Limited customization options |
| Requires artistic skills | Learning curve for new software | May not offer as much flexibility | |
| Cost of digital software and tools |
Choosing the right medium and format for your storyboard ultimately depends on your personal preferences, technical skills, and the specific requirements of your project.
Step 2: Plan your scenes
Outline the major scenes and sequences of your project
When outlining the major scenes and sequences of your project in a storyboard, it’s important to consider the following steps and factors:
Determine the key scenes: Identify the most important scenes that are essential to telling your story. These scenes should convey crucial information and contribute to the overall narrative arc.
Break down the action: Analyze each scene and determine the key visual elements and actions that need to be captured. This includes the movements of characters, objects, and any significant events or interactions.
Consider transitions: Think about how each scene will transition smoothly to the next. This includes the sequencing of events and creating a cohesive flow throughout the storyboard.
Plan for camera angles and shots: Consider the perspective and framing of each shot. Decide whether you want to use wide shots, close-ups, or specific camera movements to enhance the storytelling and capture the desired emotions.
Use visual cues: Incorporate visual cues, such as arrows or symbols, to indicate motion or specific actions within a scene. This can help communicate the intended movements or gestures of characters and objects.
Add annotations and notes: Include important notes about camera angles, shot types, dialogue, or specific details that need to be captured in each scene. These annotations provide additional guidance for the filming process.
It’s important to note that storyboarding is a flexible and creative process. Feel free to experiment with different layouts, formats, and tools to best convey your vision and enhance the storytelling aspect of your project.
Creating a Storyboard for Filmmaking
Remember, storyboarding doesn’t require you to be an exceptional artist. In fact, the video below highlights how renowned director Steven Spielberg sometimes uses simple stick figure storyboards that are later transformed into more detailed illustrations. It’s the essence of conveying the story that matters, not the appearance of the storyboard itself.
Storyboarding techniques include the use of color and direction. Red arrow signifies action, while blue indicates camera movement. Drawing arrows to indicate camera movements in different directions, using a blue marker to show camera spinning or panning, and placing a blue arrow above or bleeding into the frame to depict the camera following a person or panning are just a few examples.
When it comes to zooming, there’s no need to draw separate storyboards for the start and end points. Instead, draw the original frame and indicate where the camera will end up with a blue box. This method allows you to adapt and experiment with different types of zooms without wasting valuable storyboards.
Bringing your storyboards to the set and setting up the camera exactly as planned ensures a smoother filming process. For those not operating the camera themselves, handing the storyboards to the cameraman simplifies communication and guarantees you capture the desired shots. By following this approach, you’ll experience reduced stress, easier execution, and zero regrets.
Storyboarding is an essential step in film production, enabling filmmakers to visualize and plan their ideas before filming. Famous storyboards often exhibit artistic elements, shadows, and color, providing a preview of the movie unfolding frame by frame. While spur-of-the-moment ideas can arise while filming, having a basic understanding of each scene through storyboarding enhances the overall filmmaking process.
Storyboarding – Tomorrow’s Filmmakers – YouTube
Topics covered in this video:
- Utilizing storyboard comparisons after finishing a project
- Finding favorite movies with special features for storyboard comparisons
- Insight gained from watching storyboard comparisons
- Starting storyboarding with a template and creating a short film
- Storyboarding the entire film before filming for better understanding
- Sharing storyboards on YouTube
- Understanding the use of color (red for action, blue for camera movement)
- Different ways to indicate camera movement with arrows and markers
- Importance of storyboarding in film production
- Appearance of storyboard not crucial as long as it conveys the story
- Steven Spielberg’s use of simple stick figure storyboards
- Learning about storyboarding techniques in the lesson
- Structure of a storyboard with panels and accompanying writing
- Downloading a template for storyboarding
- Storyboarding a shootout in the woods scene
- Special features with storyboard comparisons in movies
- Purpose of storyboards in visualizing and planning ideas before filming
- Artistic elements in famous storyboards
- Preparing for spontaneous ideas while filming
- Efficient planning for shots and angles during filming
- Red symbolizing action and blue representing camera movement
- Storyboarding a zoom with one frame and a blue box for the endpoint
- Example of camera movement as Scott sees a grenade and wants a push in
- Avoiding wasteful storyboards and allowing for different types of zooms
- Using storyboards to plan and visualize movie angles and scenes
- Bringing storyboards to set to guide camera setup
- Reducing stress and capturing desired shots through pre-planned storyboards
Determine the key visual elements and actions in each scene
When determining the key visual elements and actions in each scene of your storyboard, it’s important to consider the specific details that will help convey your story effectively. Here are some steps you can follow:
- Outline the major scenes and sequences in your project. Identify the key moments that drive the narrative forward and contribute to the overall story arc.
- Consider the visual elements that will be present in each scene. This includes the setting, props, and characters involved. Think about how these elements will interact with each other to create a visually compelling image.
- Determine the specific actions that will take place in each scene. This includes character movements, interactions, and any significant events that drive the plot forward.
- Pay attention to camera angles and shot types. Think about how different angles and shots can enhance the visual storytelling and convey the emotions or messages you want to communicate.
- Include any important visual cues or symbols that help convey the themes or motifs of your story. These can add depth and meaning to your visuals.
- Use annotations to provide additional information about camera movements, lighting, or any other technical considerations that are important for capturing the desired visual effect.
By carefully considering these visual elements and actions, you can create a detailed and comprehensive storyboard that effectively communicates your vision for each scene.
Step 3: Sketch your frames
Start by sketching rough frames for each scene
When creating a storyboard, it’s important to start by sketching rough frames for each scene. These sketches don’t need to be highly detailed or artistic, but they should capture the basic composition and elements of the shot. Here are some tips for sketching your frames:
- Use simple shapes and stick figures: Don’t worry about creating elaborate drawings. Stick figures and basic shapes can effectively represent characters and objects in your scenes.
- Focus on composition: Pay attention to the placement and arrangement of elements within each frame. Consider the camera angle, perspective, and any necessary props or background details.
- Capture key actions and movements: Include important actions or movements that occur within the scene. This can help convey the flow and dynamics of the shot.
- Add basic annotations: You can add basic annotations to your sketches to provide additional context or notes about camera angles, shot types, or dialogue.
- Iterate and refine: Remember that your initial sketches don’t need to be perfect. Take the time to iterate and refine your frames as you continue to develop your storyboard.
By starting with rough sketches, you can quickly visualize your scenes and make adjustments as needed before proceeding to the next step of adding details and annotations. This step is crucial in laying the foundation for your storyboard and ensuring that your vision is effectively communicated.
Use simple shapes and stick figures to represent characters and objects
When creating a storyboard, it’s important to remember that you don’t need to be an artist to represent your ideas effectively. It’s perfectly acceptable to use simple shapes and stick figures to represent characters and objects in your frames. The purpose of a storyboard is to convey the overall composition and movement of a scene, rather than focusing on detailed artwork. By using simple shapes and stick figures, you can quickly sketch out your ideas and focus on the composition and sequence of your frames.
Here are a few reasons why using simple shapes and stick figures can be beneficial for storyboarding:
Speed and Efficiency: Using simple shapes and stick figures allows you to quickly convey your ideas without getting caught up in intricate details. This can help save time during the storyboarding process.
Focus on Composition: By simplifying your drawings, you can focus on the composition and layout of your frames. This helps ensure that the visual elements of your scene are positioned and arranged effectively.
Easy Revisions: Using simple shapes and stick figures makes it easier to revise and modify your storyboard if needed. You can quickly make changes without worrying about erasing or redrawing complex artwork.
Clear Communication: Simple shapes and stick figures can effectively communicate the basic actions and movements of characters and objects in your scene. As long as the intended actions are clear, the level of artistic detail is less important.
Remember, the purpose of a storyboard is to convey the overall flow and visual storytelling of a scene. As long as your drawings effectively communicate your ideas, using simple shapes and stick figures can be a practical and efficient approach.
Step 4: Add details and annotations
Refine your sketches by adding more details and annotations
Once you have sketched out the frames for each scene in your storyboard, it’s time to add more details and annotations to refine your sketches. This will help provide a clearer vision of the scene and communicate your ideas effectively. Here are some tips for refining your storyboard sketches:
Add more details: Enhance your initial rough sketches by adding more details to accurately represent the visual elements and actions in the scene. Use simple shapes and lines to depict characters, objects, and their movements.
Include annotations: Write important notes next to your sketches to provide additional information about camera angles, shot types, and dialogue. This will help guide the visual storytelling and ensure that everyone involved in the production understands your vision.
Consider shot composition: Experiment with different framings and compositions to create visually compelling scenes. Explore different camera angles, such as wide shots, close-ups, and over-the-shoulder shots, to enhance the storytelling and evoke specific emotions.
Use color coding: To differentiate between scenes and elements, consider using color coding in your storyboard. Assign different colors to different characters, objects, or locations to make it easier to follow the narrative flow.
Label scenes and actions: Clearly label each scene and action in your storyboard to ensure that the sequence is easy to understand. Number the frames or use descriptive labels to indicate the order of events and actions.
By refining your sketches and adding more details and annotations, you’ll be able to create a more comprehensive and visually appealing storyboard. This will effectively communicate your ideas to the production team and help streamline the filmmaking process.
To learn more about storyboarding and its techniques, you can visit the Wikipedia page on storyboarding: Storyboarding.
Include important notes about camera angles, shot types, and dialogue
When creating a storyboard, it’s important to include important notes about camera angles, shot types, and dialogue. These notes provide additional information and guidance for the scene. Here are some considerations for each element:
Camera Angles:
- Specify the desired camera angle for each shot, such as a close-up, wide shot, or overhead shot.
- Consider the perspective and positioning of the camera to capture the desired effect.
- Use camera movement and angles to enhance storytelling and evoke emotions.
Shot Types:
- Determine the appropriate shot type for each scene, such as a establishing shot, reaction shot, or point-of-view shot.
- Use shot types to convey information, highlight important details, or create a specific mood.
- Consider the composition and framing of each shot to enhance visual storytelling.
Dialogue:
- Include any necessary dialogue or voice-over in the storyboard to indicate the interaction between characters.
- Specify the speech bubbles or text boxes to indicate the content and placement of dialogue within the frames.
- Use dialogue to advance the plot, reveal character relationships, or provide important information.
Including these important notes in your storyboard ensures that everyone involved in the production process understands the vision and intention of each shot. It helps facilitate communication and collaboration among the director, actors, and production team.
Step 5: Arrange your frames
Organize your frames in a logical sequence to tell a cohesive story
Once you have sketched all your frames for the storyboard, the next step is to organize them in a logical sequence to tell a cohesive story. This is important to ensure that your audience can follow the flow of the narrative and understand the progression of events. Here are a few tips to help you organize your frames effectively:
Start with an establishing shot: Begin your storyboard with an establishing shot that sets the scene and gives viewers a sense of the environment or location.
Use clear visual cues: Arrange your frames in a way that uses clear visual cues to show the progression of time and events. This could involve placing frames side by side to depict simultaneous actions or arranging them in a chronological order.
Consider the flow and pacing: Think about the flow and pacing of your storyboard. Consider how each frame transitions into the next and whether it creates a smooth and cohesive visual narrative.
Connect frames with arrows or lines: Use arrows or lines to connect frames that are directly related to each other or show a cause and effect relationship. This can help viewers understand the logical progression of events.
Keep it simple and concise: Avoid overcrowding your storyboard with too many frames. Stick to the essential frames that effectively convey the key moments and actions in your story.
By organizing your frames in a logical sequence, you can ensure that your storyboard effectively communicates your intended story and helps guide the production process.
Flow and pacing of your project
When creating a storyboard, it’s important to consider the flow and pacing of your project. This involves thinking about how each scene transitions into the next and how the overall story unfolds. Here are some tips to consider:
Break down your project into key moments or beats. This will help you determine the natural flow and structure of your storyboard.
Pay attention to the pacing of your scenes. Think about when to use faster cuts or longer shots to create tension or build anticipation.
Use visual cues and annotations to indicate camera movements and transitions between shots. This will help convey the intended flow and movement within your storyboard.
Consider the rhythm and timing of your scenes. Use panels of varying sizes and spacing to create a sense of pacing and emphasize important moments.
Experiment with different layouts and compositions to enhance the flow and visual interest of your storyboard.
Remember, the flow and pacing of your storyboard should align with the overall narrative and mood of your project. By carefully considering these elements, you can create a storyboard that effectively communicates your vision and ensures a smooth production process.
Step 6: Finalize and share your storyboard
Review and revise your storyboard for clarity and effectiveness
Once you have created your storyboard, it is important to review and revise it for clarity and effectiveness. Here are some key steps to consider:
Review the entire storyboard: Take a step back and look at the storyboard as a whole. Ensure that the sequence of frames tells a cohesive story and flows smoothly.
Evaluate the visual clarity: Check if the visuals in each frame clearly convey the intended action or scene. If anything is unclear or ambiguous, make necessary adjustments to ensure clarity.
Assess the effectiveness of shot composition: Consider the framing, camera angles, and shot types used in each frame. Make sure they effectively capture the desired emotion or message of the scene.
Fine-tune the annotations: Review the annotations accompanying each frame. Ensure that they provide sufficient details about camera movements, shot transitions, dialogue, and other important elements.
Seek feedback from others: Share your storyboard with key stakeholders, such as the director, producers, or members of your team. Get their input and suggestions for improvement.
Make revisions as needed: Based on the feedback received, make revisions to your storyboard to address any issues or incorporate new ideas. Continuously refine and iterate until you are satisfied with the final version.
By carefully reviewing and revising your storyboard, you can ensure that it effectively communicates your vision and sets a solid foundation for your project.
Share your storyboard with key stakeholders and collaborators
Once you have finalized your storyboard, it’s important to share it with key stakeholders and collaborators to ensure everyone is on the same page. Here are some steps to effectively share your storyboard:
Compile your storyboard into a presentable format: Digitize your storyboard using software like StudioBinder or scan and compile your hand-drawn storyboard into a PDF or PowerPoint presentation.
Determine who needs to see the storyboard: Identify the key stakeholders and collaborators who need to review and provide feedback on the storyboard. This can include the director, cinematographer, production team, and any other relevant personnel.
Share the storyboard: Use a file-sharing platform or email to share the digital version of your storyboard with the identified stakeholders. Ensure that everyone has access to the files and can easily view them.
Provide context and explanations: Accompany the storyboard with detailed explanations and notes to help stakeholders understand the intent behind each frame and the overall vision of the project.
Encourage feedback and collaboration: Request that stakeholders review the storyboard and provide their thoughts, suggestions, and any necessary revisions. Encourage open communication and collaboration to ensure that everyone’s input is considered.
Schedule a meeting or discussion: Once feedback has been received, schedule a meeting or discussion to discuss the storyboard in more detail. This allows for further clarification, brainstorming, and alignment of vision among the team members.
Revise and finalize the storyboard: Incorporate the feedback and revisions into the storyboard. Make necessary adjustments to ensure that all stakeholders are satisfied with the final version.
Keep the storyboard accessible: As the project progresses, ensure that the storyboard remains easily accessible to all team members. This allows for quick reference and clarification during production.
Continuously communicate and update: Throughout the production process, maintain open communication with stakeholders and provide updates on any changes or adjustments to the storyboard.
Use color coding and labels: To differentiate between scenes, elements, and different types of shots, consider using color coding and labels within the storyboard. This helps to enhance clarity and organization.
By effectively sharing your storyboard with key stakeholders and collaborators, you can ensure that everyone involved is aligned with the vision and objectives of the project, leading to a smoother and more successful production process.
Tips for effective storyboarding
Use color coding and labels to differentiate between scenes and elements
Color coding and labels are essential tools in creating a clear and organized storyboard. They help differentiate between scenes, characters, objects, and actions, making it easier to understand and follow the visual narrative. Here are some benefits and tips for using color coding and labels in your storyboard:
Scene differentiation: Assigning different colors to each scene can help visually separate them, allowing you to easily identify and navigate through the storyboard.
Character and object identification: Using specific colors or labels for different characters or objects can help distinguish them in the storyboard, making it clear who is involved in each scene.
Action representation: Color coding can also be used to represent different types of actions or movements in the storyboard. For example, using a specific color for action sequences or special effects can add clarity and enhance the visual storytelling.
Annotations and notes: Incorporating labels and annotations in your storyboard can provide additional information or instructions. Use bold text or highlight certain labels to draw attention to important details or directions.
Using color coding and labels in your storyboard not only improves the organization and readability of the visual narrative but also facilitates communication and collaboration with your team. It ensures that everyone involved in the production process can easily understand the storyboard and effectively contribute to bringing the vision to life.
Experiment with different storyboard formats and tools
When creating a storyboard, it’s important to experiment with different formats and tools to find what works best for you. Here are some ways to explore different options:
- Traditional Hand-Drawn Storyboards: Grab a pen and paper and sketch out your frames. This method allows for flexibility and creativity.
- Digital Storyboarding Tools: Use software or online platforms designed specifically for storyboarding. These tools provide templates, drag-and-drop functionality, and easy editing options.
- Storyboard Apps: Download storyboard apps on your smartphone or tablet for quick and convenient storyboarding on the go.
- Storyboard Templates: Utilize pre-made storyboard templates available online or through software programs. These templates provide a structured layout that can save time and ensure consistency.
- Collaborative Storyboarding Tools: If you’re working with a team, consider using collaborative storyboard tools that allow for real-time collaboration and feedback.
- Storyboard Software Plugins: Some video editing or animation software offer storyboard plugins that integrate seamlessly with the rest of your workflow.
Remember that the goal is to find a method that enables you to visualize and communicate your ideas effectively. Experiment with different formats and tools to find the one that works best for you and your creative process.
Iterate and refine your storyboard
When creating a storyboard, it’s important to continuously iterate and refine it throughout the production process. This allows you to make adjustments and improvements based on feedback and changes in your project. Here are some tips for iterating and refining your storyboard:
Seek feedback: Share your storyboard with key stakeholders, such as your team members or clients, and gather their input. This will help you identify any areas that need improvement or clarification.
Make revisions: Based on the feedback you receive, make revisions to your storyboard. This could involve updating the visuals, adding more details, or reworking the sequencing of your frames.
Test it out: Consider doing a test run of your storyboard by acting out or simulating the scenes. This can help you identify any practical issues or opportunities for improvement.
Consider pacing and flow: Pay attention to the flow and pacing of your storyboard. Ensure that the transitions between frames are smooth and that the overall sequence tells a cohesive story.
Refine visual elements: Take the time to refine the visual elements in your storyboard, such as the composition, lighting, and perspective. This will help ensure that the visuals accurately represent your intended vision.
Align with the script: Continuously compare your storyboard with the script to ensure that they are aligned. Make any necessary adjustments to ensure that your visuals accurately reflect the story and dialogue.
Remember, a storyboard is a dynamic tool that should evolve as your project progresses. By continuously iterating and refining it, you can create a more effective and visually compelling blueprint for your production.
Common challenges and obstacles in the storyboarding process
Storyboarding is an important part of the filmmaking process, but it can come with its own set of challenges. Here are some common obstacles in the storyboarding process:
Lack of Artistic Ability: Not everyone is a skilled artist, and creating detailed and visually appealing storyboards can be challenging for those without drawing skills. However, it’s important to remember that the purpose of storyboards is to communicate ideas, and simple stick figure drawings can still convey the necessary information.
Translating Ideas to Images: Sometimes, filmmakers may struggle to convert their ideas and visions into concrete visuals on paper. This can be especially challenging when it comes to representing complex actions, camera movements, or special effects. Using arrows or specific notations can help clarify the intended motion or camerawork.
Time Constraints: Storyboarding can be a time-consuming process, especially when considering the number of frames needed to capture all the necessary shots. Filmmakers often have tight schedules and may feel pressured to speed through the storyboarding process, potentially leading to rushed or incomplete representations.
Changes in Plans: Storyboards serve as a blueprint for the filming process, but it’s not uncommon for plans to change during production. This can be due to budget constraints, location issues, or creative decisions. Adapting and updating storyboards to reflect these changes can be a challenge, but it is necessary to ensure a cohesive and well-executed final product.
Limited Resources: Filmmakers with limited access to professional storyboard software or artistic tools may find it challenging to create high-quality and organized storyboards. However, there are various free or affordable storyboard templates and software available that can assist in streamlining the process.
Collaborative Challenges: In a team filmmaking environment, effectively communicating and collaborating with others involved in the production is crucial. Ensuring everyone understands the visuals and intentions of the storyboards can help align the team’s efforts and avoid confusion or misinterpretation.
By being aware of these common challenges, filmmakers can better navigate the storyboarding process and create effective visual representations of their ideas.
Tips and strategies for overcoming these challenges
When it comes to storyboarding, there are several challenges that you may encounter. However, with the right tips and strategies, you can overcome these challenges and create effective storyboards:
Lack of drawing skills: Not everyone is an artist, and that’s okay. Remember that the purpose of a storyboard is to communicate your ideas visually, so focus on conveying the key elements and actions rather than creating perfect illustrations. Stick figures and simple shapes can still get the message across.
Unclear shot composition: To ensure that your storyboard accurately represents your vision, consider using shot composition techniques such as the rule of thirds, leading lines, and framing. This will help you create visually appealing and engaging frames.
Limited resources: If you don’t have access to professional software or drawing tools, there are plenty of free and user-friendly storyboard templates available online. You can also use basic tools like pen and paper or even digital note-taking apps to sketch out your frames.
Lack of clarity in conveying movement: Movement is a crucial aspect of storytelling, and it’s important to convey it effectively in your storyboards. Use arrows or lines to indicate the direction of movement for both characters and the camera. This will help provide a clear visual representation of the action.
Difficulty in visualizing camera movement: To overcome this challenge, consider incorporating shot descriptions along with your frames. Use terms like pan, tilt, zoom, or dolly to indicate specific camera movements and angles. This will provide a clear understanding of how the camera will capture the scene.
Collaboration constraints: Sharing and collaborating on storyboards can be challenging, especially when working with a distributed team. Utilize online collaboration tools or software that allows for easy sharing, commenting, and version control. This will ensure that everyone involved in the project can provide feedback and stay aligned.
Remember, the key to overcoming these challenges is to focus on conveying your ideas and vision clearly. Don’t be afraid to experiment, iterate, and refine your storyboards throughout the process. Happy storyboarding!
Steps and benefits of creating a storyboard
Creating a storyboard is a crucial step in the filmmaking process that offers several benefits. Here’s a recap of the steps and benefits of creating a storyboard:
- Determine the purpose and goals of your storyboard and choose the medium and format.
- Outline the major scenes and sequences of your project and determine the key visual elements and actions in each scene.
- Start by sketching rough frames for each scene, using simple shapes and stick figures to represent characters and objects.
- Refine your sketches by adding more details and annotations, such as camera angles, shot types, and dialogue.
- Arrange your frames in a logical sequence to tell a cohesive story, considering the flow and pacing of your project.
- Review and revise your storyboard for clarity and effectiveness before sharing it with key stakeholders and collaborators.
Benefits of creating a storyboard include:
- Visualizing the intended shots and scenes of your film, which helps refine your ideas and communicate them effectively.
- Providing guidance for actors, camera crew, and other collaborators by clearly laying out the staging and camera placement.
- Streamlining the video shoot by having a pre-planned roadmap, leading to smoother and faster production.
- Saving time, creative energy, and resources by avoiding the need to make up shots on set and improvising angles.
- Enhancing collaboration and ensuring that everyone involved in the project is on the same page, reducing misunderstandings and miscommunication.
By following these steps and leveraging the benefits of storyboarding, you can effectively plan and execute your film or video project, resulting in a more cohesive and visually compelling final product.
More for Filmmakers
- Low Budget Filmmaking: More for Less

- Lighting Department Film Roles

- Shooting An Interview

- Documentary Editing

- What is Sound Design in Film?

- Color Grading for Documentary Series or Film

- Film Set Etiquette: Professional Behaviour on Set

- Observational Documentaries And Their Impact

- Essential Skills for Film Industry Professionals

- How to Create a Storyboard in 6 Simple Steps
- What Makes a Film Successful

- Breaking into the Film Industry without Experience

- Sports Documentary Filmmaking

- How to Create a Storyboard Using Sticky Notes

- Remove Background Noise From Video
- Why Do Filmmakers Use Clapper Boards?

- Indie Films

- Indie Filmmaking

- What is Post Production in Film

- Ken Burns Effect: Creating Eye-Catching Sequences